We recently moved into a townhouse but first had floorplan decisions to make. We had to decide what living room compromises we were willing to make. Knowing when to and when not to compromise was a difficult decision until…

Quick recap:
We recently became townhouse owners. (you can read all about our new townhouse living HERE) After decades of owning houses, this is new for us. We are learning that though we gave up some unique attributes that only a house has, like an abundance of outside yard space, (and the maintenance responsibility that goes with it) it doesn’t mean that we couldn’t make the townhouse unique to us.
When we sold our house last summer, we had landed on buying a townhouse from one of our favorite local builders, Derrick Construction. Most of the homes in this small neighborhood already had owners living in them. There were a handful of completed townhouses that weren’t sold yet, and there were just a few empty lots waiting to be built on. It would have been so easy and super convenient to have just purchased one of the townhouses that was built and move right into, directly from our sold house to our new townhouse.
However…
Being an interior decorator for years, I had (perhaps a bit obsessively) studied the floorplans the builder had on their website. I had already figured out what floorplan options would work best for our family. None of the built townhouses available had those options.
Could we compromise? Would it be worth it to have the comfort of moving right in and not having to live in limbo with our stuff in storage for many months? I have to admit, that was a really hard question.
One More Consideration
There was one more issue that tipped the scales and solidified the answer for me.
None of the available townhouses were on a lot with a view that I loved.
I tried.
We went into one of the finished townhouses that was for sale and I tried to visualize liking the view, but you know when you know. And I knew that it would really start to bug me. I just wasn’t willing to give up a view.
Well, that narrowed it down significantly! There were only a couple lots, really only one empty lot that had the view that was pleasing to me.
My husband is so gracious with me. He knows that I’m at home many more hours a day than he is and he does completely trust my decorator ability to visualize, so he was totally on board with whatever decision I felt was right for us.
Decision Made
We would be building the townhouse from the ground up!
Though this would be a little awkward for the in-between time of moving out of our old place and waiting for the new place to be done, it meant that we now could optimize the floor plan and select the finishes as it was being built.
The Builder
That first design plan meeting with the builder was amazing. I had gone into it with my thoughts of what we needed and he added a few suggestions. I left with what I felt was going to be a beautiful and super functional blueprint design!
There were several changes we made, but one difference I’ll highlight today was this major change:
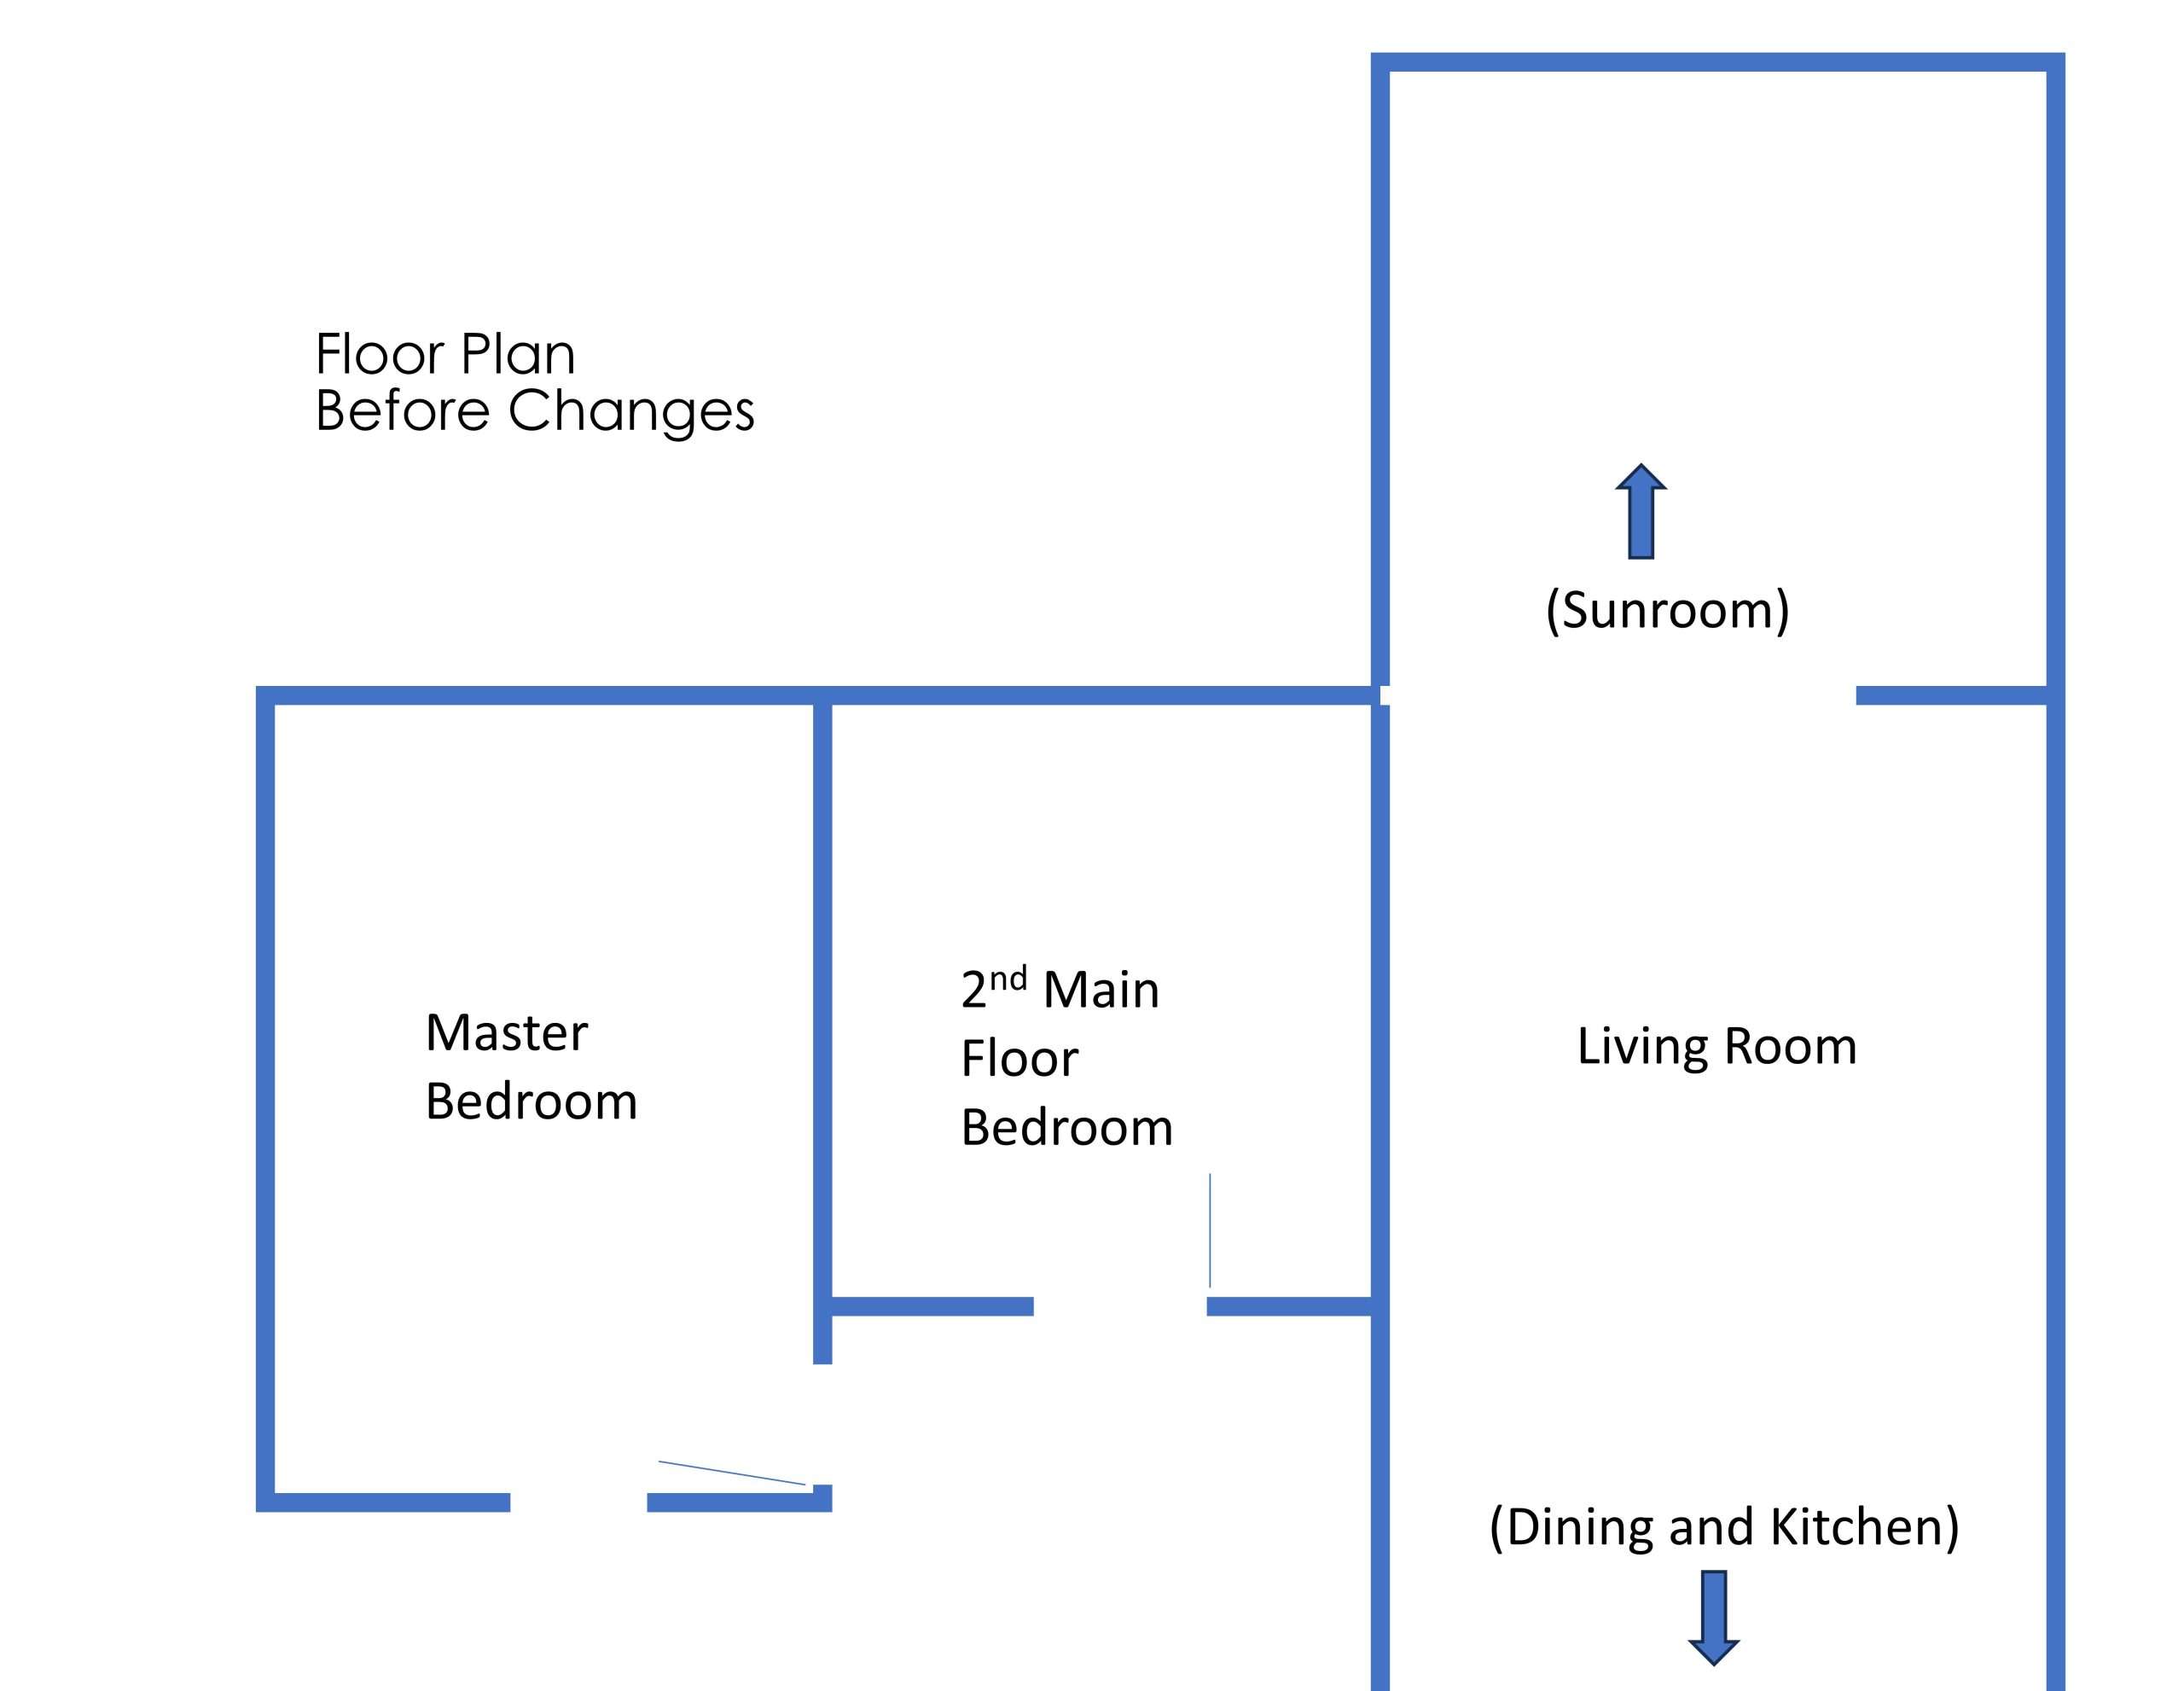
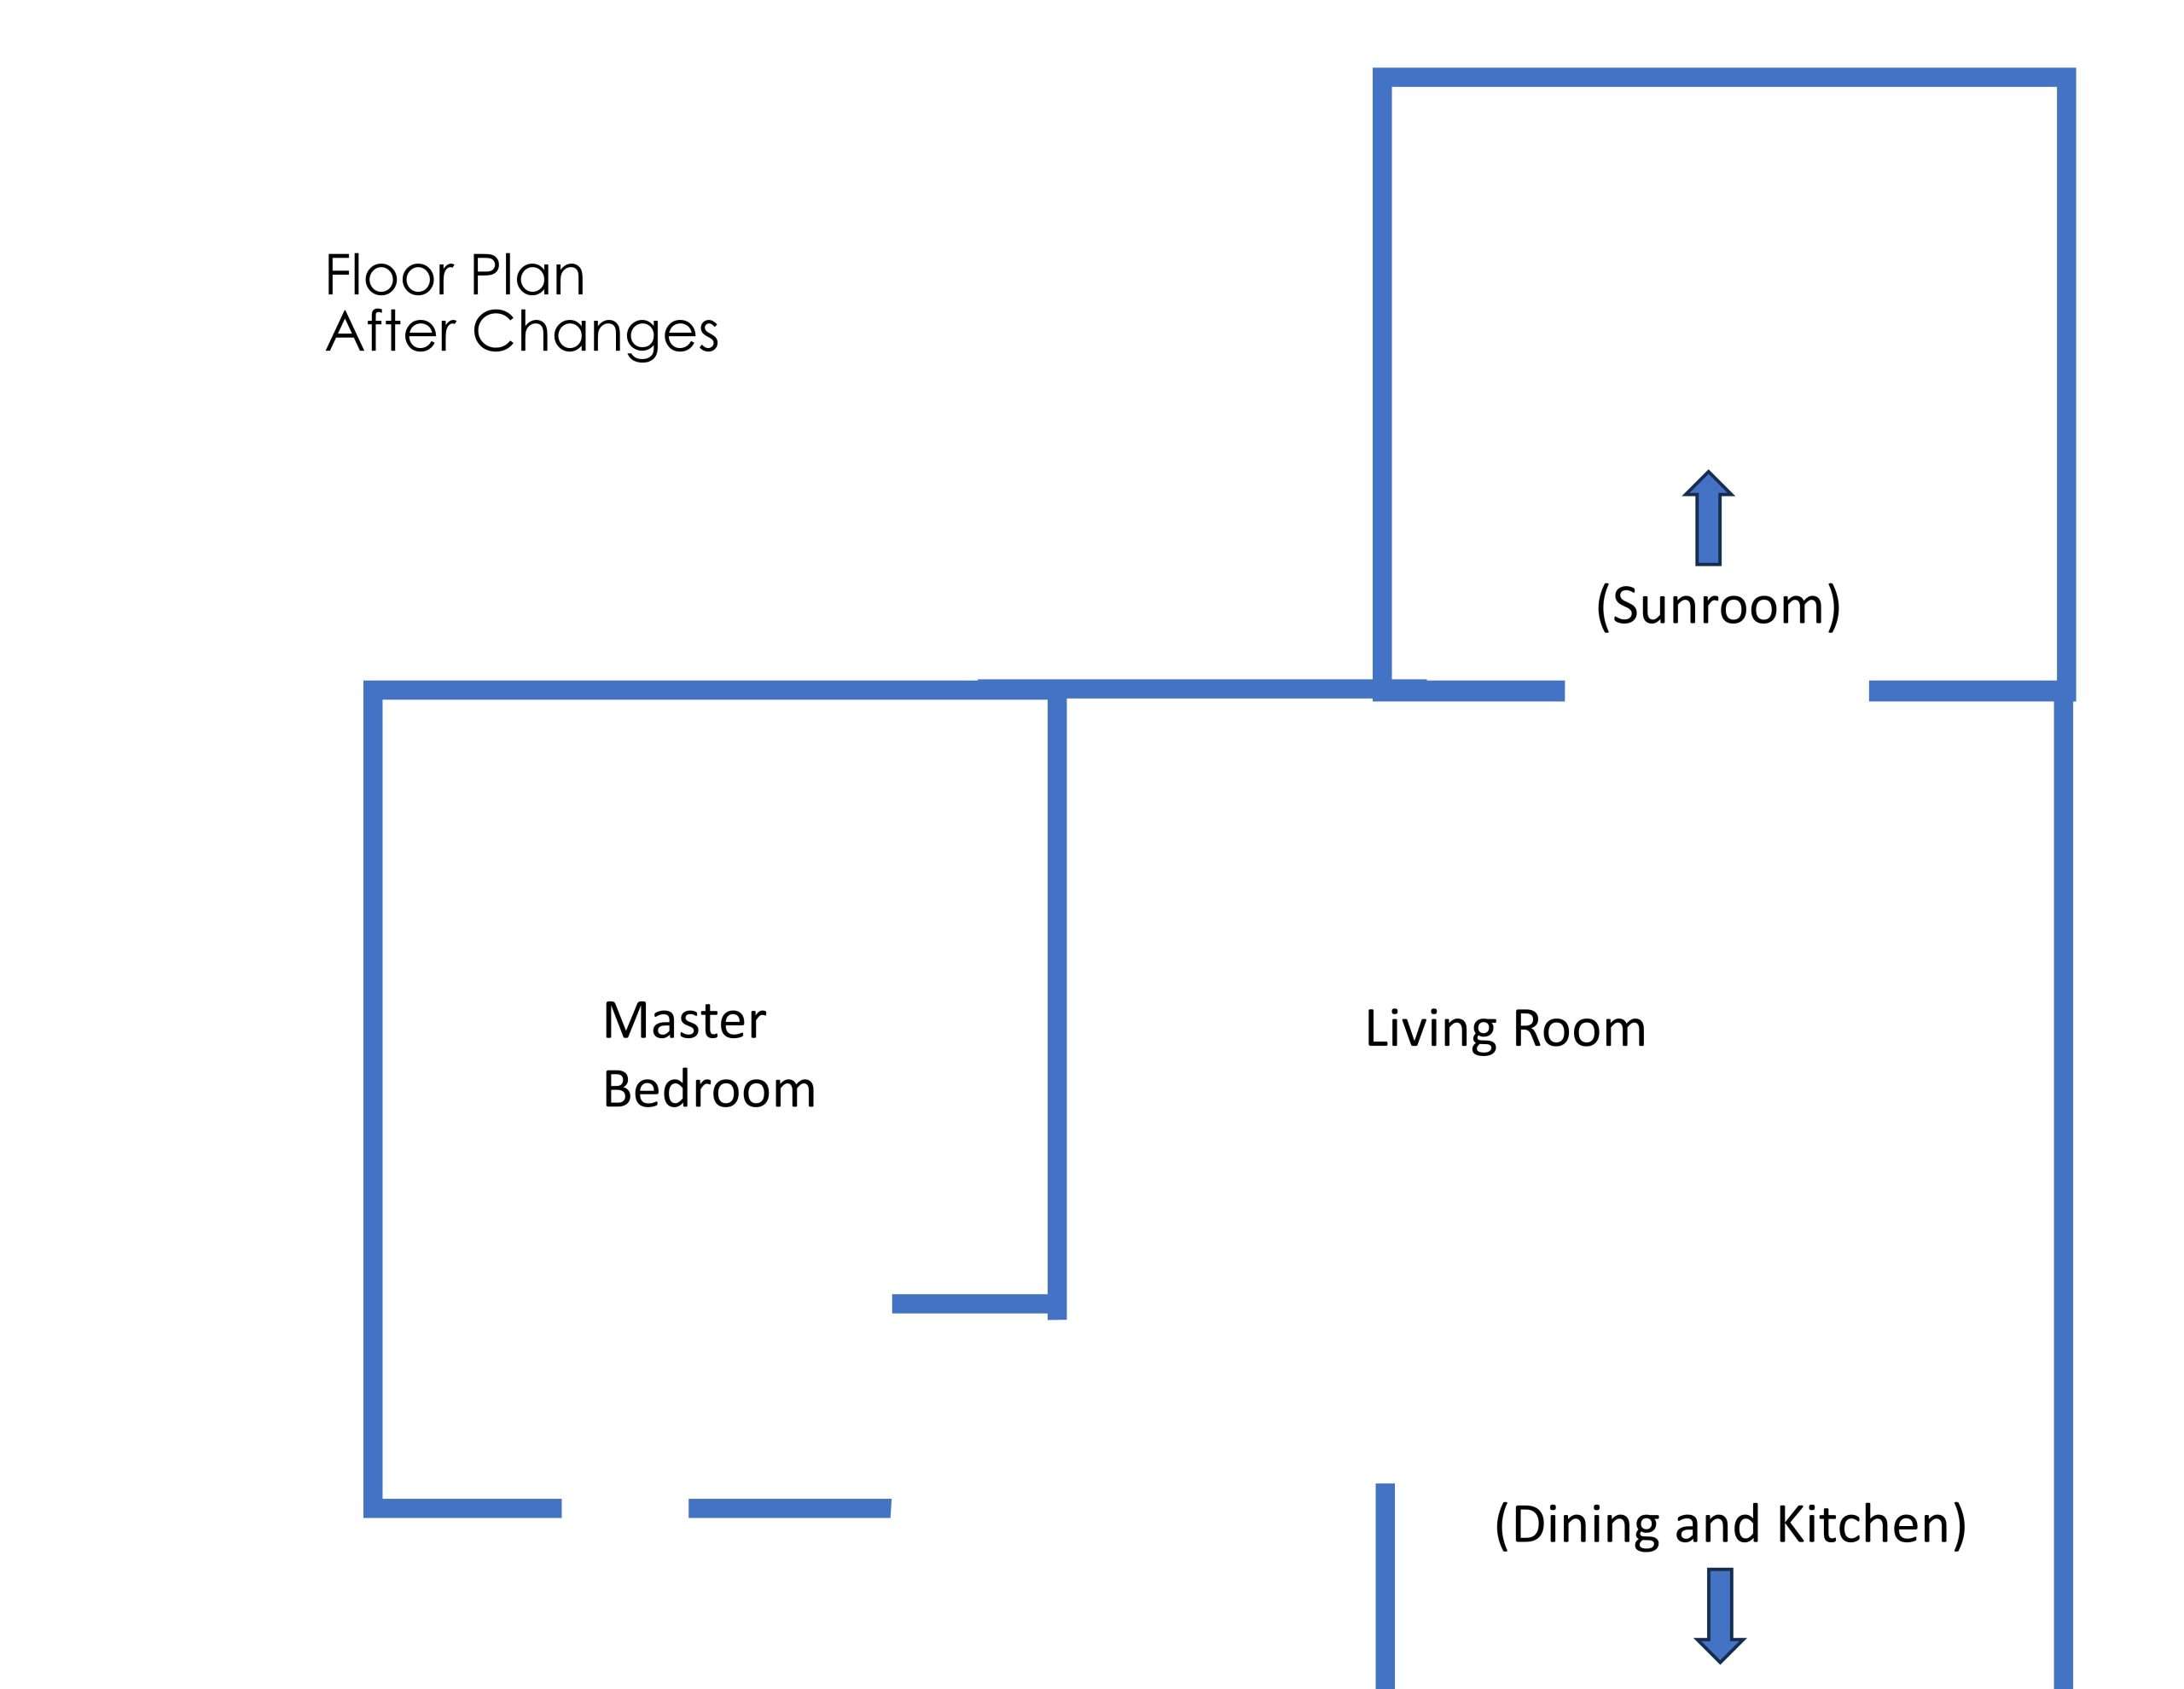
(slide the < > to the left and right to see the ‘before’ and ‘after’ changes we made to the living room and bedroom)
Losing a Bedroom
In the original floor plan, there were 2 smallish bedrooms on the main level, (we have a lower level so can pick up that extra bedroom space down there).
By having those 2 bedrooms on the main level, meant that the master bedroom would be much smaller and the living room would not only be smaller, but visually it would just be a long alley from the front kitchen entry all the way through the dining room, through the living room and into the sunroom. One very long rectangle.
Instead, as you can see when you slide the < > over to the left, we removed that 2nd bedroom, splitting the space between the master bedroom and living room.
This accomplished so much!
I’ll show you the difference it had on the bedroom space in a future post, but today I’m just concentrating on the living room. By removing the small bedroom and incorporating that space between the remaining 2 rooms, gave the living room not only a lot more space, it visually expanded the interior view avoiding that long alley feel.
It would have been nice to have that 2nd smaller bedroom on the main level. We would have used it as an office, but I felt it wasn’t worth the sacrifice of square footage for it.
So Worth It
Can you imagine how different this townhouse would feel, (and function!) if this blueprint change didn’t happen?!

This is basically where the living room wall would have been had the 2nd bedroom stayed.
That would have been a compromise!
The living room would have been significantly smaller.
And the view out those back sunroom windows, (which I’ll highlight in a future post) would have been oh so different if we would have settled for the other lot that was already built on!
Reveal
Our living room now:

I am super happy with the space. The living room is a great size for us and even has space to host a gathering.
Favorite Furnishng Piece
This open living room plan and visually is part of the whole great room including the kitchen and dining area. In a future post I’ll detail the furniture I chose for this space but I did want to talk about my favorite furnishing piece in here quick.
When it’s just the two of us, which is most of the time, we tend to watch the little TV around the corner in the sunroom, but for weekends and football games that larger TV in the living room is great.
Can you spot that large TV?
No?
Don’t see it?
Don’t feel bad, even in real life visitors don’t realize it’s there.
It’s right there:

Because everything in this space is so open, trading out an ugly TV for actual art as the main focus was important to me. There are clever ways to cover up TVs, but this is my favorite way for this space.
The Frame TV Details
The Frame TV allows me to display any artwork or photo I want. I can easily change it out seasonally or anytime I feel like it. With so many classic artworks available online for free, there is never a shortage of free art to display.
The TV came with a thin black bezel, (skinny little frame) but I wanted it to totally feel like a large vintage picture, so I bought this wooden frame designed especially for The Frame TV.
The 55″ TV fit our space perfect, but it does come in other sizes, ranging from I think something like 85″ down to 32″. If you’re shopping for a nice TV, you may be interested in checking out The Frame TV HERE, I did notice it’s on sale as of the date of this post. It is really a perfect answer to not only camouflaging the TV right in plain sight but truly being an art focal point in that space!
I’m excited to share more details with you on how we’re making this townhouse our cozy home.
Thank you for stopping by, I appreciate you reading along.
Interested in more reading? HERE is the Blog Landing with the most recent posts.
Follow and share this blog with your friends!
Be sure to sign up to receive an email when a new blog post is published.
Marlene aka Mom says
What an amazing change!! It makes all the rooms seem so much nicer and larger! Lovely.
Liz says
Thanks! I’m so glad we had the ability to make this floor plan change!